Want to draw a helicopter? It might seem tricky at first, but honestly, it’s pretty simple once you break it down. This guide will walk you through everything, step-by-step, so you can make your own cool helicopter drawing. We’ll cover what you need, how to start, and even some tricks to make it look real. You’ll be surprised how quickly you can get the hang of it!
Key Takeaways
- Start with basic shapes to build your helicopter’s body, like ovals and rectangles.
- Use simple lines to add details like rotors and landing gear, making sure they fit the overall size.
- Experiment with shading and shadows to give your helicopter drawing a sense of depth.
- Don’t be afraid to try different colors to show different times of day or moods.
- Practice often, even with quick sketches, to improve your drawing skills.
Understanding Helicopter Anatomy
Key Components of a Helicopter
Okay, so before we even think about sketching, let’s break down what makes a helicopter a helicopter. It’s not just a whirlybird, you know? You’ve got the main rotor, which is kind of the star of the show, providing lift and control. Then there’s the tail rotor, which keeps the whole thing from spinning out of control. And of course, the fuselage, which is the body. Understanding these parts is key to getting your drawing right.
Here’s a quick rundown:
- Main Rotor: Lifts and steers.
- Tail Rotor: Stops spinning.
- Fuselage: The body.
- Cockpit: Where the pilot sits.
- Landing Gear: For, well, landing.
Simplifying Complex Shapes
Helicopters look complicated, right? All those curves and angles. But here’s a secret: everything can be broken down into simpler shapes. Think ovals, cylinders, and cones. The fuselage? It’s basically an oval. The tail boom? A long cylinder. By seeing these basic forms, you can build up the helicopter piece by piece. It’s like building with LEGOs, but with pencils. For example, you can use aerial surveying techniques to get a better understanding of the real-world shapes.
Proportion and Balance in Design
Proportion is super important. If the tail is too long or the rotor blades are too short, it just won’t look right. Balance is about making sure everything feels visually stable. The main rotor needs to be centered over the fuselage, and the tail boom needs to be the right length to balance it all out. It’s a bit like a seesaw – everything needs to be in harmony. You can even look at Leonardo da Vinci’s designs for inspiration on balance and proportion.
Getting the proportions right can be tricky, but don’t sweat it too much at first. Just focus on getting the overall feel of the helicopter. You can always tweak things later. It’s all about practice and getting a feel for what looks right.
Essential Drawing Tools

Gathering Your Art Supplies
Okay, so you wanna draw a helicopter? Awesome! First things first, let’s talk about the stuff you’ll need. You don’t need to break the bank, but having the right tools definitely makes things easier. Think of it like cooking – you can technically make a cake with just a spoon and a bowl, but it’s gonna be way easier (and probably tastier) with a mixer and proper pans. So, let’s get started with the basics. You’ll need some drawing papers or a sketchbook, a few pencils, an eraser, and maybe some blending tools.
Choosing the Right Pencil
Now, about those pencils… not all pencils are created equal. You’ve probably seen pencils with numbers and letters like 2B or HB. What does it all mean? Well, the letter ‘H’ stands for hardness. The higher the number before the ‘H’ (like 4H, 6H), the harder the lead. Harder leads make lighter, finer lines – great for sketching light outlines. ‘B’ stands for blackness. The higher the number before the ‘B’ (like 2B, 4B, 6B), the softer and darker the lead. Softer leads are perfect for shading and adding depth. HB is right in the middle – a good all-purpose pencil. I usually start with an HB for my initial sketch and then switch to a 2B or 4B for shading. Experiment and see what feels best for you! You can also use graphite drawing equipment for shading.
The Importance of an Eraser
Don’t underestimate the power of a good eraser! Seriously, it’s your best friend when you’re learning to draw. Everyone makes mistakes, and that’s totally okay. The key is to be able to fix them without ruining your whole drawing. I recommend having two types of erasers: a kneaded eraser and a regular pink eraser. Kneaded erasers are soft and moldable – you can shape them to erase small areas or lighten up your lines without completely removing them. Pink erasers are good for getting rid of darker lines and making clean corrections. Trust me, you’ll be using your eraser a lot, so invest in a good one! It’s one of the essential drawing tools for any artist.
Having the right tools can really make a difference in your drawing experience. It’s not just about having fancy stuff, but about having tools that help you achieve the effects you want. Experiment with different pencils, erasers, and papers to find what works best for you. And don’t be afraid to make mistakes – that’s how you learn!
Starting Your Helicopter Sketch
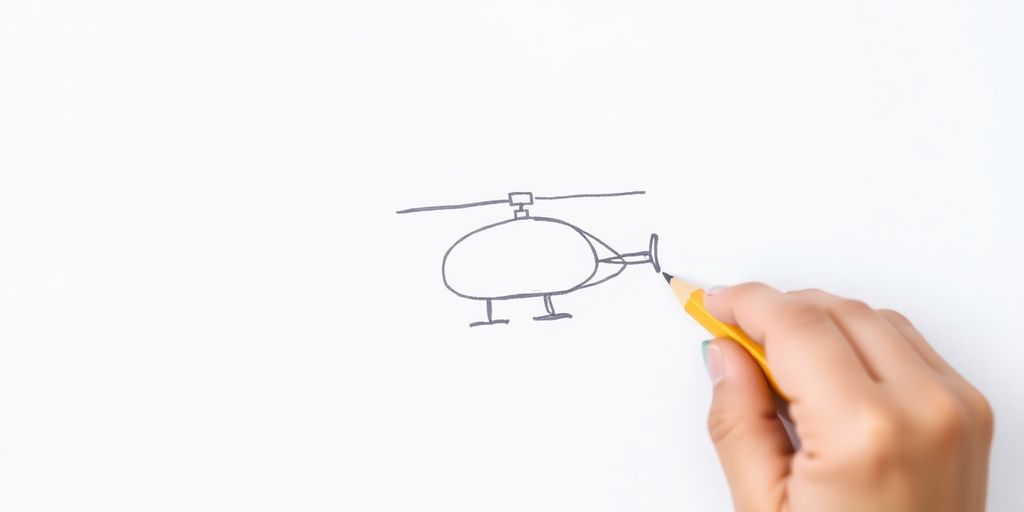
Beginning with Basic Outlines
Okay, so you wanna draw a helicopter? Cool! The best way to start is with simple shapes. Don’t get bogged down in details right away. Think about the overall form. Start with a light sketch of the main body. I usually begin with a long oval or a rounded rectangle. This will be the fuselage, the main part of the helicopter. Keep it light, because you’ll be erasing and adjusting as you go. Think of it like building a house – you start with the foundation. This basic outline is your foundation for a killer helicopter drawing. It’s way easier to add details later than to try and get everything perfect from the start.
Forming the Main Body
Now that you’ve got your basic shape, it’s time to start giving it some definition. This is where you start to suggest the helicopter’s unique form. Think about where the cockpit will be, and how the body tapers towards the tail. Add some subtle curves to make it look less like a simple oval and more like an actual helicopter body. Don’t be afraid to experiment and make mistakes. That’s what erasers are for! I like to lightly sketch in the windows at this stage, just to get a sense of proportion. Remember, it’s all about building up the drawing gradually.
Adding the Tail and Rotors
Alright, let’s add the tail and rotors. The tail usually extends out from the back of the fuselage, and it has a smaller rotor on the end. Keep the tail simple for now – just a straight line or two will do. For the main rotor, draw a circle above the fuselage. This will be the base for the rotor blades. Don’t worry about the blades themselves just yet. We’ll get to those later. The key here is to get the placement and proportions right. A helicopter with a tiny tail or a giant rotor just won’t look right. Think about the helicopter transport business and how important balance is!
I always find it helpful to look at reference photos at this stage. It’s easy to get proportions wrong if you’re just drawing from memory. A quick Google search can give you a ton of different helicopter images to use as inspiration. Don’t copy them exactly, but use them as a guide to make sure your drawing is accurate.
Adding Intricate Details
Refining the Cockpit Area
Okay, so you’ve got the basic shape of your helicopter down. Now comes the fun part: adding those details that make it pop! Let’s start with the cockpit. This is where you can really show off your skills. Think about the shape of the windows. Are they flat, curved, or a combination? Pay attention to the angles and how they reflect light. Add some internal structure, like seats or a control panel, even if it’s just a suggestion. It’ll give the viewer a sense that there’s more going on inside. Don’t forget the windshield wipers! Those little guys add a touch of realism.
Drawing the Rotor Blades
The rotor blades are super important. They’re what make a helicopter a helicopter, right? Don’t just draw straight lines. Think about the way they curve and twist. Consider the number of blades. Most helicopters have two or more. Are they all the same length? Do they have the same shape? Add some thickness to the blades, and maybe even a slight bend to show the force of the air. This is where you can really play with perspective.
Including Landing Skids
Landing skids might seem simple, but they’re crucial for grounding your drawing in reality. They’re not just straight lines; they have curves and angles that give them strength and stability. Think about how they connect to the body of the helicopter. Are they welded on? Bolted? Add some small details like rivets or supports to make them look more realistic. Also, consider the surface they’re landing on. Is it flat ground, or is it uneven? This will affect the way the skids are positioned.
Remember, it’s all about observation. Look at real helicopters and pay attention to the details. The more you observe, the more realistic your drawings will become. Don’t be afraid to experiment and try new things. The most important thing is to have fun and keep practicing!
Here’s a simple breakdown of adding details:
- Start with the big shapes and work your way down to the smaller ones.
- Pay attention to the way light and shadow affect the details.
- Don’t be afraid to use references.
- Practice, practice, practice!
Adding intricate details is what separates a good drawing from a great one. So take your time, be patient, and have fun with it! Consider using a helicopter stencil to help with the initial shapes. If you’re looking for inspiration, check out some helicopter engineering drawings for ideas. And if you want to see some real helicopters in action, maybe consider a Wolverine Heli-Hike Tours adventure!
Bringing Your Helicopter to Life
Shading for Depth and Dimension
Okay, so you’ve got your basic helicopter shape down. Now comes the fun part: making it look like it’s actually there. Shading is key to creating the illusion of depth. Think about where your light source is. Is it coming from above? From the side? Wherever it is, the areas facing the light will be brighter, and the areas away from the light will be darker. Start with light pencil strokes, gradually building up the shadows. Don’t be afraid to go dark in some areas, especially in crevices and underneath parts of the helicopter. This is where you can really start to see your drawing pop. If you want to improve your sketching techniques, consider practicing with different light sources.
Creating Realistic Reflections
Helicopters are often made of metal and glass, which means they’re super reflective. Adding reflections can make your drawing look way more realistic. Look at reference photos of helicopters and notice where the light hits and how it bounces off the surfaces. On a shiny surface, reflections are usually bright and defined. On a more matte surface, they’re softer and more diffused. Try using a white pencil or eraser to create highlights that mimic reflections. It’s all about observing how light interacts with different materials. If you’re planning a trip to Alaska, consider a glacier tour to see how light reflects off the ice.
Adding Shadows for Impact
Shadows aren’t just about making things look dark; they’re about creating impact. The shadows cast by your helicopter can ground it in the scene and give it a sense of weight. Think about the shape of the shadow and how it changes depending on the angle of the light. A shadow cast by a helicopter sitting on the ground will be different from a shadow cast by a helicopter in flight. Also, consider the surface the shadow is falling on. Is it smooth or rough? This will affect the way the shadow looks. Don’t underestimate the power of a well-placed shadow to bring your drawing to life. If you’re interested in seeing helicopters in action, consider a fair tour that might include a helicopter ride.
Remember, drawing is all about practice. Don’t get discouraged if your first few attempts don’t look perfect. Keep experimenting with different shading techniques and light sources, and you’ll eventually develop your own style. The more you draw, the better you’ll get at seeing light and shadow, and the more realistic your drawings will become. For programmers looking to add a 2D game art helicopter, these shading techniques are essential.
Exploring Color and Mood

Choosing Your Color Palette
Okay, so you’ve got your helicopter drawn, and now it’s time to think about color. Don’t just slap on any old shade! Think about what you want your drawing to say. Color is a powerful tool for setting the mood. Are you going for a bright, cheerful vibe, or something more serious and dramatic?
Consider these points when picking your colors:
- What’s the purpose of the helicopter? A rescue helicopter might need bright, attention-grabbing colors. A private one could be sleek and understated.
- What kind of environment is it in? A desert scene might call for warm, sandy tones, while a snowy landscape could use cool blues and whites.
- What’s your personal style? Don’t be afraid to experiment and use colors that you love!
Think about how different colors make you feel. Red can be exciting or aggressive, blue can be calming or sad, and yellow can be happy or energetic. Use these associations to your advantage!
Reflecting Time of Day
The time of day can really change how a scene looks. Think about how the light shifts from sunrise to sunset. Early morning light is often soft and warm, with long shadows. Midday light is harsh and direct, washing out colors. Sunset light is golden and dramatic, casting long, warm shadows.
Here’s how you can reflect the time of day in your drawing:
- Sunrise/Sunset: Use warm colors like oranges, pinks, and reds. Add long, soft shadows. color grading techniques can help you achieve the right look.
- Midday: Use bright, saturated colors. Keep shadows short and sharp.
- Night: Use cool colors like blues and purples. Add highlights to show the reflection of moonlight or artificial lights.
Conveying Purpose Through Color
Color can tell a story about your helicopter. Is it a military helicopter? Then maybe you’d use camouflage greens and browns. Is it a news helicopter? Then maybe you’d use bright colors to make it visible. Is it a toy helicopter for kindergarten? Then maybe you’d use fun, playful colors like bright blues, reds, and yellows.
Here are some ideas:
- Military: Greens, browns, grays, blacks.
- Rescue: Bright reds, oranges, yellows, whites.
- Private: Sleek blacks, silvers, grays, blues.
- Toy: Bright reds, blues, yellows, greens, pinks.
Don’t be afraid to break the rules and use colors in unexpected ways. The most important thing is to have fun and create something that you’re proud of. You can even use subtle color use to guide the viewer’s eye.
Alternative Drawing Approaches
Sometimes, sticking to one method can feel a bit limiting, right? It’s like only knowing one way to cook your favorite meal. You might get good at it, but you’re missing out on a whole world of flavors! That’s why exploring different drawing approaches is super helpful. It not only keeps things interesting but also helps you develop a more well-rounded skill set. Let’s dive into some alternative ways to sketch that helicopter.
Streamlined Sketching Techniques
This approach is all about speed and efficiency. Instead of focusing on every little detail right away, you start with the bare essentials. Think of it as creating a skeleton for your drawing. The goal is to capture the overall shape and proportions as quickly as possible. This is great for brainstorming ideas or when you don’t have a lot of time. It’s also a fantastic way to loosen up and avoid getting bogged down in perfectionism early on. You can always add the details later. This is a great way to learn easy drawing methods.
Focusing on Segmented Parts
Instead of trying to draw the entire helicopter at once, break it down into smaller, more manageable pieces. Think of it like building with LEGOs. You start with individual bricks and then assemble them to create the final structure. This approach can be especially helpful if you’re struggling with the overall complexity of the helicopter. By focusing on one part at a time, you can concentrate on getting the details right without feeling overwhelmed. It’s also a great way to improve your understanding of the helicopter’s anatomy. Heli Alaska offers aerial surveying services.
Developing Intuitive Drawing Skills
This approach is less about following specific steps and more about trusting your instincts. It’s about letting your hand flow freely and allowing the drawing to emerge organically. This can be a bit scary at first, especially if you’re used to being very precise. But it can also be incredibly rewarding. It’s a way to tap into your creativity and develop a more personal style. Plus, it can help you overcome artistic blocks and find new ways to express yourself. It’s like learning to play a musical instrument by ear instead of reading sheet music. It might take some practice, but eventually, you’ll be able to create something truly unique. This is a great way to explore different drawing types.
Think of these alternative approaches as tools in your artistic toolbox. The more tools you have, the better equipped you’ll be to tackle any drawing challenge. Don’t be afraid to experiment and find what works best for you. The most important thing is to have fun and keep creating!
Drawing a Helicopter for Young Artists
Simple Steps for Beginners
Okay, let’s make drawing a helicopter super easy for kids! We’re going to break it down into simple shapes. Think about it like building with blocks. Start with a big shape for the body, then add smaller shapes for the tail and the top part that spins. It’s all about making it fun and not worrying too much about being perfect. Remember, it’s your helicopter, so you can make it look however you want! You can even use printable PDF helicopter coloring pages to add color after you draw.
Using Ovals as a Foundation
Ovals are your friends! Seriously, they’re great for drawing almost anything, and helicopters are no exception. Start with a big oval for the main body. Then, use smaller ovals for the cockpit and other parts. Don’t be afraid to experiment with different sizes and angles. It’s like playing with Play-Doh, but on paper. If you want to draw a Chinook helicopter, you can use two ovals for the body with this guide.
Making it Fun for Kindergarteners
For the little ones, keep it super simple. Think big, round shapes and don’t worry about details. Here’s a few ideas to make it fun:
- Use bright colors.
- Add silly faces to the helicopter.
- Make up a story about where the helicopter is going.
Drawing should be fun, not frustrating. If they get stuck, just encourage them to keep trying and to enjoy the process. It’s all about letting their creativity fly!
And if you need a simple line drawing, you can find a free vector online. There are also free helicopter coloring pages available for more complex designs. You can even try a printable helicopter craft activity to develop fine motor skills. Remember, the goal is to have fun and explore their artistic side. For more detailed instructions, you can learn to draw a helicopter with step-by-step guides.
Mastering Rotor Blade Motion

Drawing a helicopter is cool, but making those rotor blades look like they’re actually spinning? That’s where the magic happens. It’s not just about drawing lines; it’s about suggesting movement and speed. I remember the first time I tried this, it looked more like a weird fan than a helicopter. But don’t worry, it gets easier with practice. Let’s get into it.
Techniques for Dynamic Blades
Okay, so how do we make those blades look like they’re moving? One way is to avoid drawing them as solid, static shapes. Instead, think about using lighter lines or even broken lines to give the impression of motion. Another trick is to slightly curve the blades, because centrifugal force and all that. You can also play with the thickness of the lines, making them thicker where the blade is ‘more present’ and thinner where it’s blurring. It’s all about creating that visual illusion of speed. You can also use a fast shutter speed to capture the motion.
Achieving a Blurred Effect
This is where things get interesting. Blurring is your best friend when it comes to showing motion. You can achieve this in a few ways. One is to use a smudge tool (if you’re drawing digitally) or gently rub the graphite with your finger (if you’re using traditional pencils). Another method is to use hatching or cross-hatching to create a sense of movement. The key is to keep it subtle; you don’t want to lose the shape of the blades entirely, just suggest that they’re moving really fast. Here are some ideas:
- Use light, feathery strokes.
- Experiment with different grades of pencils for varying blur intensity.
- Try using a kneaded eraser to lift some of the graphite and create a softer edge.
Think of it like this: you’re not drawing the blades themselves, but rather the path they’re taking through the air. It’s about capturing the essence of motion, not the precise details.
Practice for Natural Movement
Like anything else, drawing realistic rotor blade motion takes practice. Don’t get discouraged if your first few attempts look a bit wonky. The more you experiment with different techniques and observe real helicopters, the better you’ll get. Try sketching from photos or videos, paying close attention to how the blades appear at different speeds. Also, don’t be afraid to use reference lines to help you maintain the correct proportions and angles. You can also use streamlined sketching techniques to improve your skills. Keep at it, and you’ll be drawing dynamic, believable rotor blades in no time!
Addressing Common Drawing Challenges

Ensuring Realistic Proportions
Getting the proportions right can be tricky. It’s easy to end up with a helicopter that looks a bit off, like the tail is too long or the rotor blades are too small. One helpful trick is to break down the helicopter into simple shapes first. Think of the main body as a rectangle or oval, and then build from there. Also, compare each part to the others as you draw. Does the cockpit look like it fits the body? Does the tail seem like the right size compared to the main rotor? Keep checking and adjusting as you go. It’s all about relative sizes.
Tips for Straight Lines
Straight lines are important for a clean, technical drawing of a helicopter. But let’s be real, drawing a perfectly straight line freehand is tough! Here are a few things that have helped me:
- Use a ruler (obviously!). For longer lines, it’s the best way to go.
- Try drawing the line in one swift motion, rather than short, hesitant strokes.
- Practice! The more you draw, the steadier your hand will become.
Don’t be afraid to rotate your paper to find the most comfortable angle for your hand. Sometimes, drawing a vertical line is easier if you turn the paper slightly. Experiment and see what works best for you.
Overcoming Artistic Hurdles
Sometimes, you just hit a wall. You’re not happy with how the drawing is going, and you feel like giving up. It happens to everyone! Here’s what I do:
- Take a break. Seriously, step away from the drawing for a few minutes (or even a day). Come back to it with fresh eyes.
- Look at reference photos. Sometimes, you just need a reminder of what a real helicopter looks like.
- Don’t be afraid to erase and start over. It’s part of the process! You can find executive charter services if you need inspiration.
- Try a different approach. If you’ve been focusing on details, zoom out and look at the overall composition. If you’ve been struggling with the outline, try focusing on the shading instead. Maybe try some small sketches to warm up.
- Remember that every drawing is a learning experience. Even if you’re not thrilled with the final result, you’ve still learned something along the way. You can also try some perspective drawing exercises.
And hey, if all else fails, there’s always tomorrow! Keep at it, and you’ll get there. You can also try some drawing skills exercises. Remember to practice your basic skills and you can also try some new skills.
Drawing can be tricky sometimes, right? We all hit walls where our art just doesn’t look right. But don’t worry, there are simple ways to get past these common problems. Want to learn how to make your drawings better and easier? Head over to our website for more tips and tricks!
Conclusion
So, we’ve reached the end of our helicopter drawing adventure! I really hope you had fun and learned a bunch of new things. Remember, drawing is all about practice, so don’t get down on yourself if your first try isn’t perfect. Just keep at it! There are tons of other drawing guides on my site if you want to try drawing other cool stuff. And hey, I’d love to hear what you thought of this guide or if you have ideas for future ones. Drop a comment below and let me know!
Frequently Asked Questions
How can I make my helicopter look more realistic?
To make your helicopter drawings look more real, study pictures of actual helicopters. Pay close attention to how light hits them, creating bright spots and dark areas. These details make a big difference!
What if my proportions look off?
If your helicopter parts don’t look right next to each other, use light lines to help you. You can measure and compare different parts as you draw to keep everything in proportion.
How do I draw the rotor blades in motion?
To show the rotor blades moving, draw them with slight curves or make the edges a little blurry. This trick makes them seem like they’re spinning fast.
Is there a trick to drawing straight lines for the rotor blades?
You can use a ruler to draw straight lines for the rotor blades. But also try drawing them without a ruler sometimes. This helps you get better at drawing straight lines freehand, which looks more natural.
What should I do if my drawing doesn’t look right?
It’s okay if your first try isn’t perfect! Drawing takes practice. Keep trying, and you’ll get better over time. Don’t be afraid to erase and start again.
Can I draw a helicopter using only simple shapes?
Yes, you can start with simple shapes like ovals and rectangles. Break down the helicopter into these basic forms first, then add details. This makes it much easier.
How do I add depth and shadows to my helicopter drawing?
To add depth, think about where the light source is coming from. Areas facing the light will be brighter, and areas away from it will be darker. Use shading to show these differences and make your helicopter pop off the page.
What’s the best way to improve my helicopter drawing skills?
The best way to get better is to draw often. The more you practice, the more your hand and eye will work together, and your drawings will improve naturally.